Showing posts with label WIP. Show all posts

Wednesday, 2 May 2018

Morticians: Display Base WIP

This is a little catch-up post covering the display and travel board for my Guild Ball Morticians team.


It started life as a Mob Football tray from Bendy Boards (http://www.bendyboards.co.uk/) but wasn't quite sufficient for my needs. The black mat you can see peeking through is magnetic sheeting, and I've attached metal washers to the underside of all my figures. It's strong stuff and you can turn the populated board upside down and nothing falls out, or mount the washers sideways for a test photo ...


I wanted the board to have a little character, so using some plaster resin (you can see it in the first picture) I built some stone walls. After that, I took some Vallejo basing paste to fill in the gaps and add earth. Basically, it should look graveyard-ish by the time it's finished.


Priming this thing was the "what have I done" moment. We're way outside my comfort zone here ...


... but it's okay! Some  greys, some browns and a bit of foliage and it's looking like an actual thing now. Phew. Still need to tidy up the black edging but we're almost there.


I've added grass clumps, some static grass to support the clumps, more grass peeking through the gaps between stones.


... and after a few months' thinking it's finished. I went back and painted brick patterns across the top of the wood, as it looked strange without it. Add a few details on the base and call it done!


Saturday, 27 January 2018

Improving My Photography (Jan-18)

I've been fiddling with my lightbox to get better photos - something closer to the colours I see when looking at the model. Below is the journey I took with my Ork to get to a good place.

The default option with lightsource above lightbox, diffused.


Changed to increase exposure.


Changed the camera's elevation to be a little higher.


Increased the exposure again, without moving the light source.


Increased f-value to f11 but felt it was leaving the background in sharp focus as well now.


Pushed the light source back to be over the camera instead of over the lightbox. Getting close now.


Realised I'd overcomplicated life a little. Moved the light back to almost overhead the miniature again, and downstepped the exposure.


There will be further adjustments over time, but for the moment this feels pretty good - and gives an accurate representation of what the model looks like in real life. Here's how the camera setup looks in reality.


Sunday, 31 December 2017

Warploque: Bayourk Witchdokta WIP

It's New Year's Eve, so here I am painting. Here's to a 2018 filled with whatever you want it to be.

Back into the habit of posting my WIP work. For this figure, I'm trying to do Things That Are Different at the moment. You don't build muscles without stretching them. Painting is the same.

This was my first attempt at trying to create an iridescent effect on skin.


So on the right lines but not quite right. Okay, not everything can be a success first time but that's okay.

Back to the drawing board, and I've started with a lighter blue, defined everything better and started into the first highlights. Shadows will see other colours added to achieve the effect better. Same for the final highlights too.


Next up is reworking the leather. My original colour choice was far too light and adding shadow didn't help. He's old and weathered, so the coat should reflect that.


Much happier with this, and reading David Soper's article on old leather (https://sproketsmallworld.blogspot.co.uk/2017/12/c-girl-akito-painting-worn-leather.html) has helped me think about colour choices and pushing up the contrast.


Next up will be the super-definitely-positively-probably the last highlight, then adding colour interest into the shadows with glazes.

Tuesday, 5 September 2017

Hobby Progress - September

The problem with painting models in a batch is that the updates don't feel especially interesting and end up less frequent than you'd like. It ends up a little worse when you're fortunate enough to be playing 40k again on a regular basis.

Two of my regular opponents were able to make it across last week, so two evenings set aside for hobby were pulled into gaming against filthy Tau and even filthier Death Guard. The first game was a resounding win for my Wolves, and the second was a crushing defeat at the hands of a Defiler. They're significantly nastier in 8th than they were in 5th!


On the painting side, all my marines are now based and have decals applied before the final weathering stage to the armour. Everything requiring a 32mm base is properly based (40mm pending) and they even have arms glued on - which wasn't the case in the action shots above.


My standard bearer looks a lot happier with an icon in the middle of the banner. Glad I opted for the gradient effect in the background behind the wolf head, as pure yellow on yellow would have looked strange. Still want to repaint the words underneath as the spacing is incorrect and annoying me.


Took the plunge and made a couple of small conversions to my Primaris marines too. So my Lieutenant and Captian now have more appropriate power swords. Clipping these off was a nerve wracking experience, as I rarely convert - and didn't want to ruin the models. Happily it worked out fine, so once painted it should be seamless. Phew.


Finished squads should start appearing in the near future. But as I rarely post WIP content this was a nice change of pace and a reminder things do happen in the background!

Saturday, 19 August 2017

I ATEN'T DED

To borrow from the wonderful Granny Weatherwax, I ain't dead - but where on earth did the past few weeks ago?

Things have been happening, I promise. But time has not been kind - with family and work taking priority and the hobby time falling by the wayside. All positive, after I passed probation at my new work and took on more responsibility to keep me out of mischief.

Some painting has happened and my Primaris Inceptors have started to come together slowly.


They've performed reasonably well on the field of battle too. Their ranged fire has been wiping out Death Guard and Tau alike, but then they've failed miserably in close combat.

Alongside this, a friend who doubles as a very good photographer came to visit and gave me some quick pointers on getting all of a figure in focus - so here's my Ancient standard bearer again with a little more clarity.


I'm going to redo the "FENRIS" wording on the banner, finally add a wolf head decal to it as well, add more depth on the beard and add something to the right shoulder as it feels quite flat - but this feels like a more accurate representation of the miniature I see in front of me, than the one in previous pictures.

Couple of months ago I backed the beautiful looking Astropolis II Kickstarter to feed my sci-fi civilian habit, and all the models arrive this week. It's an overwhelming quantity and they're all glorious. I haven't a clue where to start and don't care.


54 miniatures and 4 crates if you're counting. It's projects like this which excite me and terrify me in equal measure!
Sunday, 23 July 2017

Space Wolves: Primaris progress #2

My Space Wolves are advancing, slowly. I hit a low point last weekend when after spending so much time painting grey, when I realised they were pretty much back to sprue grey - which feels like you haven't achieved anything despite the time spent.

However! After edge highlighting, chipping and shading I'm at this stage with a couple of the test troops.

Pardon the wobbly photo, but hopefully it gives an idea of how much weathering I'm attempting to apply. This also helped to give me afirmation that this is the effect and style I want in these troops - they've reached the battlefield and thrown themselves in at the deep end.

Adding the redish brown as the shade helps to lift the greys, as it was quite desaturated with the cool greys, and this gives some much needed definition. Next up is adding highlights under a few of the larger and medium sized chips, then painting the shoulderpads and knees with chapter colours.

Picking out suitable heads to bring that Space Wolf feel to the figures is key, and rummaging through my bits box has yielded a lot more heads than I thought ...


27 heads there and there were another ~10 heads available, but they didn't sit correctly inside the armour and I've discarded those for this project. The next challenge is working out which head fits best with each figure to give the right feel. Hooded models like the Captain and Inceptors need shorter hair, whereas the Intercessors can afford the crazier Viking/anime haircuts.

There's a painting competition at my local GW next weekend, and one of these figures needs to be finished. Upside: it's next weekend. Downside: I only have until Wednesday night as I'm away next weekend. This will be entertaining for a serial procrastinator like myself.

Sunday, 14 August 2016

Guild Ball Morticians: Display Base WIP

Hobby has taken a backseat over the last few weeks as my last job finished up and I'm hunting for the next (the downside of becoming a contractor) which sucked up free time and meant my figures aren't getting painted while I try to find someone to give me money in return for work. However, I'm back into hobby stuff this week and managed to make progress on a side project that I've wanted to get going for a while - a display and travel board for my Guild Ball Morticians team.


It started life as a Mob Football tray from Bendy Boards (love these guys) but wasn't quite sufficient for my needs. The black mat you can see peeking through is magnetic sheeting, and I've attached metal washers to the underside of all my figures. It's strong stuff and you can turn the populated board upside down and nothing falls out.


I wanted the board to have a little character, so using some plaster resin (you can see it in the first picture) I built some stone walls. After that, I took some Vallejo basing paste to fill in the gaps and add earth. Basically, it should look graveyard-ish by the time it's finished.


Priming this thing was the "what have I done" moment. We're outside my comfort zone here ...


... but it's okay! Some  greys, some browns and a bit of foliage and it's looking like an actual thing now. Phew. Still need to tidy up the black edging but we're almost there - however, this is where I'd like advice from the smarter and wiser among us. What do I do now? Do I need more grass clumps, some static grass to support the clumps, more grass peeking through the gaps between stones? Also, would it be overkill to drop tombstones behind each character slot? Quick dry fit illustration ...


... thoughts? Currently I'm leaning toward adding the tombstones but clipping the smaller ones at various angles to make them appear to be sinking into the uneven ground.

Monday, 18 July 2016

Purgatory: Hannibal WIP #1

I've taken to not posting work in progress shots of my figures in the last few months, as usually once they're started then it doesn't take long to finish - but this month has been a long one, and I was getting twitchy it was a month since the last post.

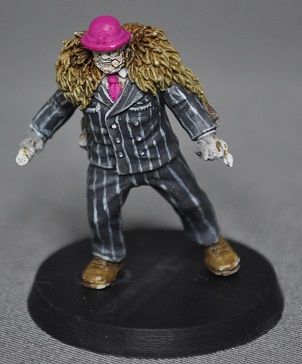
On the painting table is Hannibal from Purgatory, and he's looking very pinstriped at the moment. It isn't a painting technique I've tried before, and it's hard - moreso on this scale. Definitely a technique that needs more practice and a steadier hand to master, but for my first attempt this will do just fine.


There isn't much more to go with the suit, other than tidying the odd overspill on the rear of the figure and then it's on to the rest of the model. The hat and tie are going to move down into blues from the pinkish starting colour, as it's a little too garish right now. After that, it's skin!

Of course there's an elephant to accompany this fellow, but that's for another update ...


Sunday, 10 January 2016

Zombicide: Black Plague - painting begins

I've started into the Zombicide: Black Plague figures this week. Nothing finished yet, but here's the first WIP of tabletop level paintjobs.


If you haven't played Zombicide yet, it's a co-operative boardgame where it's you versus the board in various missions with relentless waves of zombies joining the battle each round, and you have to find the balance between completion the missions and re-killing the undead. Marvellous fun, 2-3 hours for longer games and a real hoot - glad I backed this version, and there'll be quite a few additions over the coming months. Pressure is on for getting the rank and file back on the table, as we've been playing this quite a bit since mid-December arrival so they need to be ready quicksharp for the next round of games incoming.

These represent the Runners (14 of 'em), Fatties (another 14), an Abomination and a Necromancer from the base box. The Walkers will follow later, as there's 30-40 of those buggers and even I'm not daft enough to take on that many figures simultaneously - a lesson learned from my Gretchin mob last year! When gaming, weight of numbers on the table becomes a problem and it's hard to distinguish who's what - so I'll be painting the base edges red for Fatties, and orange for Runners. Everything else should be evident enough not to require it.


I'm batch painting the Fatties and going for reasonably boring colours, so mid-range blues, reds, greys and greens. By working on a small group it means I can move reasonably quickly while adding a little variety in where the colours are used. There's more coming in a few months, so I'll repeat the trick with slightly different colours, but the hordes will be dull but legion. The bases have a little texture added using some Vallejo Sandy Paste - my experience of it so far? It's like a resin-based version of Polyfilla.


Shading down on the first fellow. Detail and highlights next, and possibly even followed by proper pictures! Few of the details are crisply modelled but not obvious to my eye on the first pass, so shadows before highlights gives me a chance of spotting them and painting them correctly. There won't be gore added to the zombies until the very last stage as they'll all be matt varnished on completion and I don't want that beautiful glossy blood effect dampening. It will also be my shameless opportunity to cover up any glaring errors with blood and calling it "characterful", in the same way I call my awful cooking "rustic" ;)

Thursday, 24 December 2015

Infernal Golem and painting glowing blades

So, I got ahead of the Christmas wrapping curve, and was able to make a little progress with the big man today. While I remain undecided on how to proceed with the blades, I did manage to reach a happy mid-point where it's not pure black, and does echo the greens of the embedded stones. I realised they put me in mind of warpstone from Warhammer Fantasy, so have proceeded to paint the blades as though they'd been fashioned with that same magic. A flying step-by-step for how I got the effect.

Basecoat the blade with Dark Green, then a dark brown wash into the recess

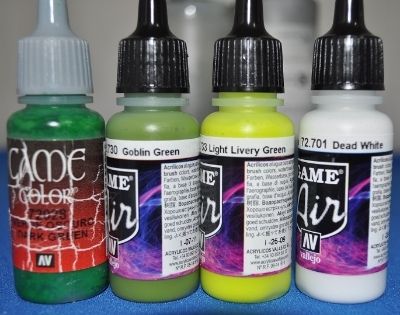
Drybrush with Goblin Green then Livery Green along the edges

Smooth down with a Dark Green glaze

Go bananas with the rust effect to see how it looks ...

Glue the damned thing together, even though it's not finished.

Still quite a bit to do, but it's nice to see the model taking shape and I'm happy with the progress! Alright, it won't be winning awards but I've had fun painting it :D Needs highlights adding back on the metals, but now I'm undecided whether to stick with the blades as is, or crack on with the original plan ... I may wuss out for the time being and leave it as is. Once finished and matt varnish is applied, they could benefit from gloss varnish being added to give an onyx-like feel.

As I've kept the OSL quite soft on the stones, despite their size, I'm not sure how much I'd apply from the blades back to the body, but will chew on it over the festive season. Also - now it's assembled I've realised that the weight of this figure is an issue. It's unbalanced and leaning forward heavily - which is how the sculpt requires it assembled, but now I need to counterbalance at the back to stop it tipping over.

Progress now paused for a few days, so Merry Christmas one and all!

Tuesday, 22 December 2015

Infernal Golem and OSL

With a little mojo returning in the run up to Christmas, here's another update!

Good times.

Following a lovely little glowing eye guide by jah-joshua, to achieve that lovely object sourced lighting effect (OSL), I didn't have quite the same colours, so a spot of improvisation required ...


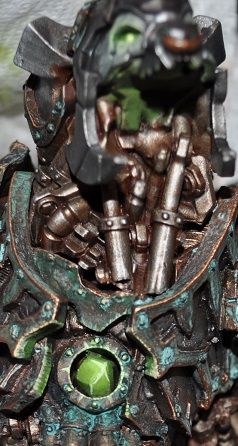
I've done the Golem's eyes and the warpstones powering him, and find myself very happy with how this effect has turned out.

But do you see the Xbox logo in there too?

I think my Golem's powered by Microsoft ...

There's green inside the upper jaw, as I'm doing the effect inside the mouth to show the glow coming from inside the creature's workings.

Looks a bit wafty right now, but will be fine once the lower jaw's attached.


In parallel, I've been working on the hands and weapons ...

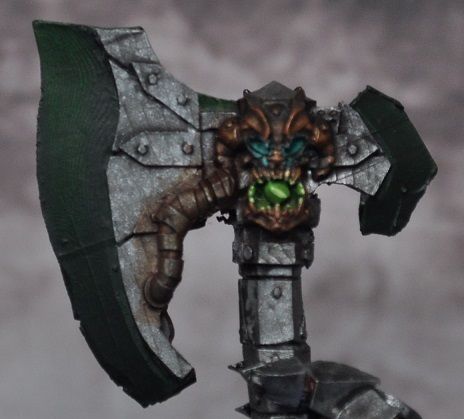
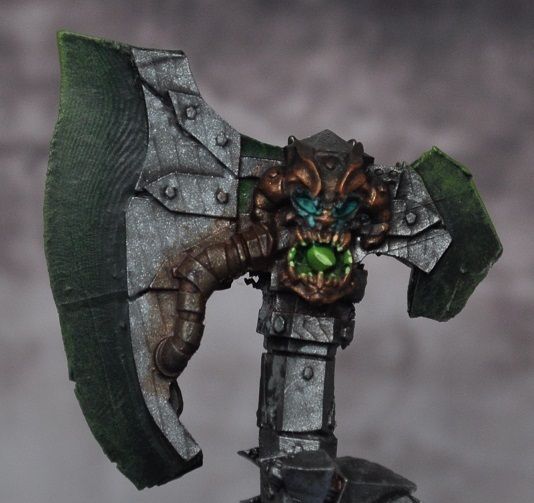
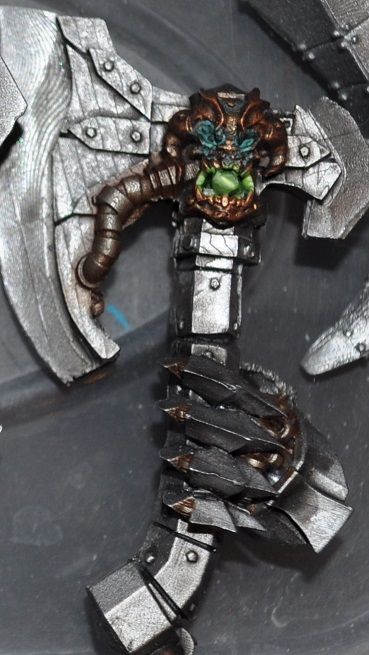
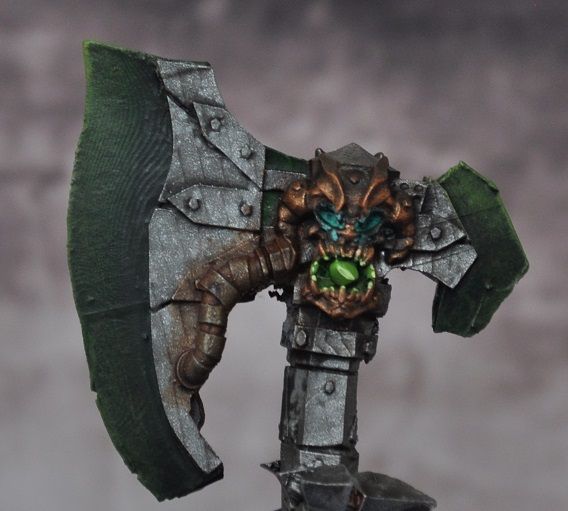
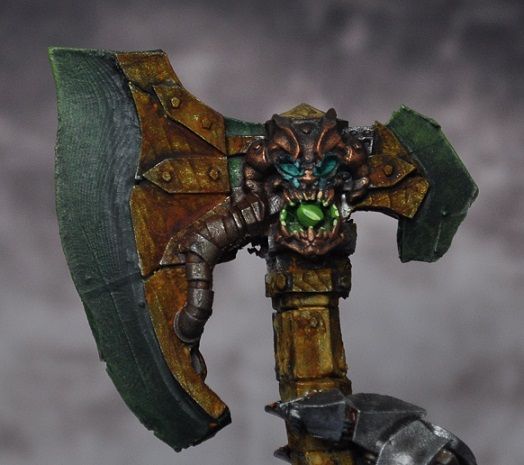
Coupled with the verdigris around the eyes, it gives a little personality to the axe heads.

However ... as there's already so much metal, I was thinking that the axe blades could be stone. Thoughts?

Monday, 21 December 2015

Infernal Golem progresses

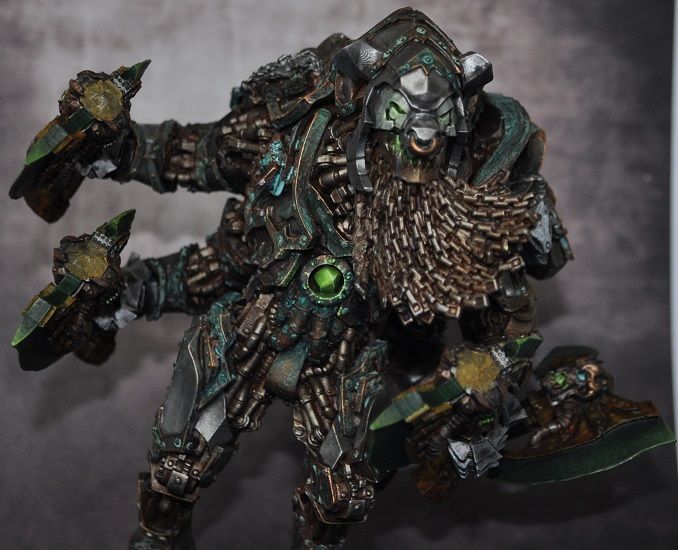
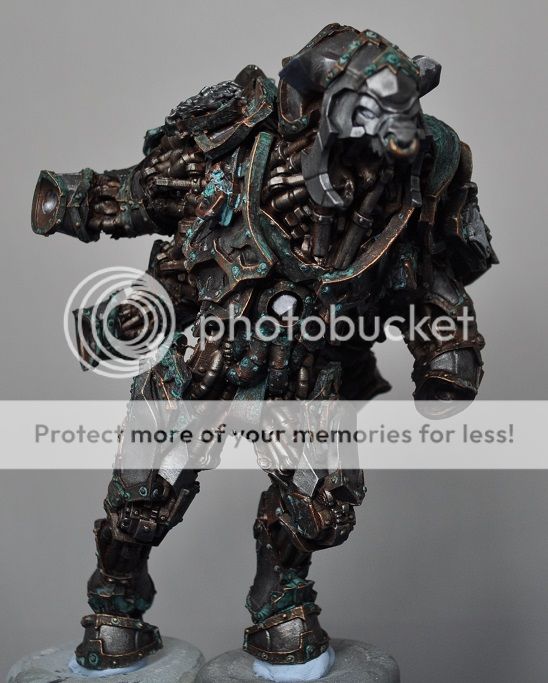
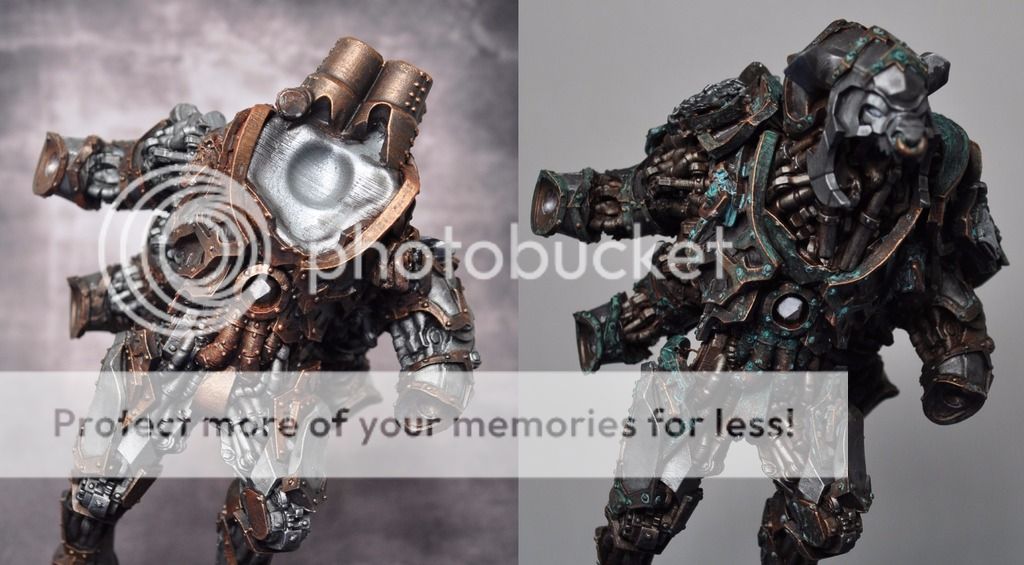
Doesn't time fly. Some painting progress has been made, with only the metal plates remaining reasonably clean at this point. He's shaded and verdigrised to heck at this point, and had the good fortune of a head being added. The slightly 'off' join on the neck isn't an issue as there's a metal beard to be added which will make that go away.


It's possibly hard to tell compared to the last photo further up the thread - so here's a side by side comparison. Arms are in progress to the same stage but not added, because it all overlaps quite confusingly and makes detail work tricky for me.


The inner workings received a coat of AK Interactive Rust Streaks, then I pulled off the excess with cotton buds. Haven't used this before, but will be doing so again. You may cry "he's ruined it!" at this point, but actually I'm really happy with how its turning out - the colouring is a little more severe in the photo than real life, and pleasingly uneven. It looks like an unloved machine that hasn't been looked after - and may be a little pissed off by this.

Deciding on how or even whether to apply rust onto the exterior metal plates. I think I should, but any thoughts or comments for more experienced weathering wizards?

Last up, a recently backed Kickstarter project - the Basius series of molds to apply your greenstuff to for custom bases. It'll be a little while until they get a run out, but they look the business and the project was well run - even if the project page was laid out like a Geocities escapee :D


But they stack oh so neatly!