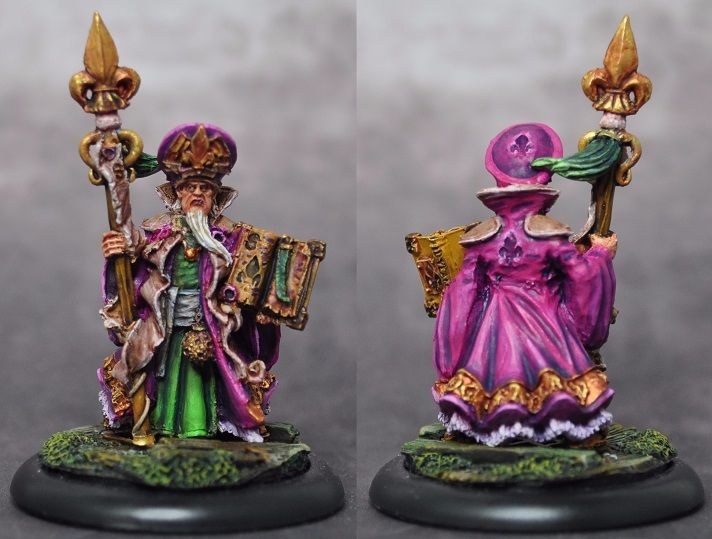
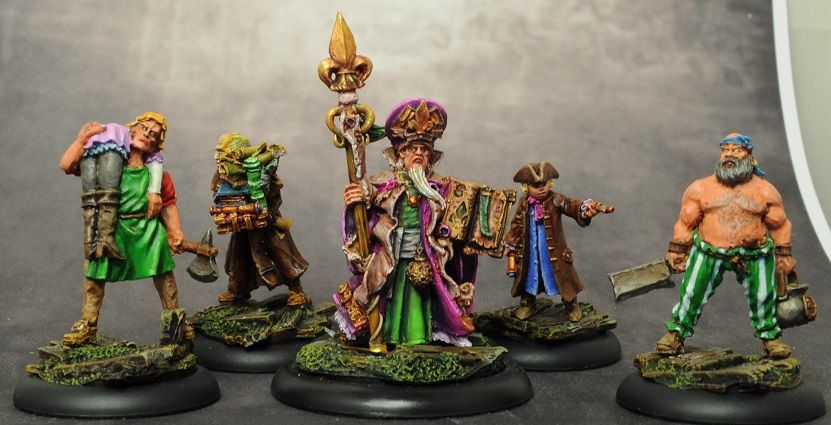
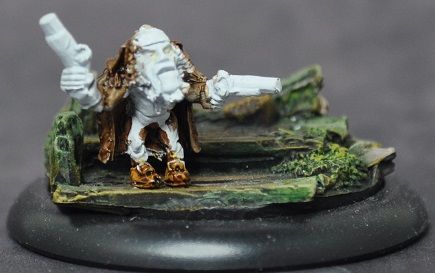
Obulus time! The mighty captain, and a mandatory pick.
This now means I'm able to legally field two fully painted teams - Morticians and Fishermen. Bit of a watershed moment as I've never played any tabletop game with fully painted teams before. So even this small achievement feels pretty pleasing.
Oh and here's a ball ...
Exciting, huh?
Do wish I'd approached the display base the same way and trimmed a little from the bottom of the tombstones and sunk them in the base rather than letting them sit atop. Lesson learned for the future.
Determined to complete the full Morticians rosterbefore moving to the next project, so that leaves me with three more figures to do - Graves, Bonesaw and Scalpel. Hoping to have those finished in the next week or two while my mojo's working.
Friday, 9 September 2016
Wednesday, 7 September 2016
Guild Ball Morticians: Silence
We have another member of the team wrapped up - this time it's Silence. I can't recall where I saw the white robes for him, but loved the idea and accordingly nicked it and implemented it badly but there you have it.
He's got a bit of (OTT) OSL and I gloss varnished his little decanter of poison. I love playing this guy, he's seriously versatile, tough as nails and capable of handing out significant amounts of pain.
Made a bit of a schoolboy error with my Morticians. I started painting them as a group and having them on the painting table for this long has dampened my enthusiasm to the point I just want them gone now. Beginning to run out of steam, but Obulus is on the table next so on we go!
Monday, 5 September 2016
Guild Ball Morticians: Ghast
Continuing my theme of trying to finish up the work-in-progress figures, here's Ghast for the Morticians.
Tried to make the skintones a little greyer in the dark areas, but not a grand success - but he's finished and it's onto the next.
Thursday, 1 September 2016
Guild Ball Morticians: Cosset
Second update in the same week? It's like buses! Well, that's if buses were updates on a blog, instead of large red vehicles capable of carrying dozens of people on a predefined route.
Another member of the Morticians finished up, this time it's Cosset. Yes there's a point missing from her trident. It was sadly lost in the great Curious Child Incident of 2016.
I've tried to introduce a bit of texture to the dress and fabric with striping and, while it's a little heavy-handed in places, I like the result so will try again on another figure at some point with a bit more care. One frustration was painting up the poppet doll on back of her belt, then you apply the swooshy fabric and it's now obscured! Grrr.
It also highlights one minor niggling frustration with the Guild Ball range in general - the two petite ladies I've painted so far (Cosset and Angel) have enormous eyes compared to all the other, larger figures. Still, that's nearly a legal team fully painted and I'm hopeful of wrapping a few more figures in the coming weeks.
Another member of the Morticians finished up, this time it's Cosset. Yes there's a point missing from her trident. It was sadly lost in the great Curious Child Incident of 2016.
I've tried to introduce a bit of texture to the dress and fabric with striping and, while it's a little heavy-handed in places, I like the result so will try again on another figure at some point with a bit more care. One frustration was painting up the poppet doll on back of her belt, then you apply the swooshy fabric and it's now obscured! Grrr.
It also highlights one minor niggling frustration with the Guild Ball range in general - the two petite ladies I've painted so far (Cosset and Angel) have enormous eyes compared to all the other, larger figures. Still, that's nearly a legal team fully painted and I'm hopeful of wrapping a few more figures in the coming weeks.
Wednesday, 31 August 2016
Guild Ball Morticians: Casket, Dirge & Display Board
So, the display board is finished. I've opted for a sensible three headstones in a line, added some more foliage and left it at that. Happy with the end result.
In addition to the board, my goal for the Morticians is finished.
Also, two of the players are now wrapped - Casket and Dirge.
This weekend I'll be attending a two-day painting course run by Siege Studios. In my local gaming group there are no other painters - which makes it different to gauge how well you do things; as I'm keen to improve as a painter, here's hoping this will assist in unlearning bad habits and learning good/better ones.
I've also changed how pictures are hosted so if you click them they'll expand, rather than redirecting you to PhotoBucket.
In addition to the board, my goal for the Morticians is finished.
Also, two of the players are now wrapped - Casket and Dirge.
This weekend I'll be attending a two-day painting course run by Siege Studios. In my local gaming group there are no other painters - which makes it different to gauge how well you do things; as I'm keen to improve as a painter, here's hoping this will assist in unlearning bad habits and learning good/better ones.
Sunday, 14 August 2016
Guild Ball Morticians: Display Base WIP
Hobby has taken a backseat over the last few weeks as my last job finished up and I'm hunting for the next (the downside of becoming a contractor) which sucked up free time and meant my figures aren't getting painted while I try to find someone to give me money in return for work. However, I'm back into hobby stuff this week and managed to make progress on a side project that I've wanted to get going for a while - a display and travel board for my Guild Ball Morticians team.
It started life as a Mob Football tray from Bendy Boards (love these guys) but wasn't quite sufficient for my needs. The black mat you can see peeking through is magnetic sheeting, and I've attached metal washers to the underside of all my figures. It's strong stuff and you can turn the populated board upside down and nothing falls out.
I wanted the board to have a little character, so using some plaster resin (you can see it in the first picture) I built some stone walls. After that, I took some Vallejo basing paste to fill in the gaps and add earth. Basically, it should look graveyard-ish by the time it's finished.
Priming this thing was the "what have I done" moment. We're outside my comfort zone here ...
... but it's okay! Some greys, some browns and a bit of foliage and it's looking like an actual thing now. Phew. Still need to tidy up the black edging but we're almost there - however, this is where I'd like advice from the smarter and wiser among us. What do I do now? Do I need more grass clumps, some static grass to support the clumps, more grass peeking through the gaps between stones? Also, would it be overkill to drop tombstones behind each character slot? Quick dry fit illustration ...
... thoughts? Currently I'm leaning toward adding the tombstones but clipping the smaller ones at various angles to make them appear to be sinking into the uneven ground.
It started life as a Mob Football tray from Bendy Boards (love these guys) but wasn't quite sufficient for my needs. The black mat you can see peeking through is magnetic sheeting, and I've attached metal washers to the underside of all my figures. It's strong stuff and you can turn the populated board upside down and nothing falls out.
I wanted the board to have a little character, so using some plaster resin (you can see it in the first picture) I built some stone walls. After that, I took some Vallejo basing paste to fill in the gaps and add earth. Basically, it should look graveyard-ish by the time it's finished.
Priming this thing was the "what have I done" moment. We're outside my comfort zone here ...
... but it's okay! Some greys, some browns and a bit of foliage and it's looking like an actual thing now. Phew. Still need to tidy up the black edging but we're almost there - however, this is where I'd like advice from the smarter and wiser among us. What do I do now? Do I need more grass clumps, some static grass to support the clumps, more grass peeking through the gaps between stones? Also, would it be overkill to drop tombstones behind each character slot? Quick dry fit illustration ...
... thoughts? Currently I'm leaning toward adding the tombstones but clipping the smaller ones at various angles to make them appear to be sinking into the uneven ground.
Saturday, 23 July 2016
Purgatory: Hannibal
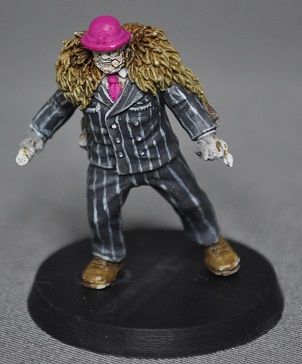
That was quicker than expected ... Hannibal and his (tiny, adorable) war elephant are finished!
It's not my best work (but what is?), but I'm happy with the outcome - and it's different from my usual fare. Lovely sculpt, albeit my eyes just couldn't pick out a few details I'm sure are there. This was good fun to paint, despite my initial reticence on the detail being a little beyond me - but glad I took the plunge.
The suit did get a blue blaze just to dampen down the brightness of the pinstripe, and it did the job well. The striping is reflected in the patterning of the elephant which gave pleasing balance when they were next to each other. I swapped out the standard base for a heavier industrial base, which should make more sense thematically when a few more of these are painted up in time.
You can see this and learn more about the figure range and upcoming Kickstarter for their game, over on their Facebook page.
It's not my best work (but what is?), but I'm happy with the outcome - and it's different from my usual fare. Lovely sculpt, albeit my eyes just couldn't pick out a few details I'm sure are there. This was good fun to paint, despite my initial reticence on the detail being a little beyond me - but glad I took the plunge.
The suit did get a blue blaze just to dampen down the brightness of the pinstripe, and it did the job well. The striping is reflected in the patterning of the elephant which gave pleasing balance when they were next to each other. I swapped out the standard base for a heavier industrial base, which should make more sense thematically when a few more of these are painted up in time.
You can see this and learn more about the figure range and upcoming Kickstarter for their game, over on their Facebook page.
Monday, 18 July 2016
Purgatory: Hannibal WIP #1
I've taken to not posting work in progress shots of my figures in the last few months, as usually once they're started then it doesn't take long to finish - but this month has been a long one, and I was getting twitchy it was a month since the last post.
On the painting table is Hannibal from Purgatory, and he's looking very pinstriped at the moment. It isn't a painting technique I've tried before, and it's hard - moreso on this scale. Definitely a technique that needs more practice and a steadier hand to master, but for my first attempt this will do just fine.
There isn't much more to go with the suit, other than tidying the odd overspill on the rear of the figure and then it's on to the rest of the model. The hat and tie are going to move down into blues from the pinkish starting colour, as it's a little too garish right now. After that, it's skin!
Of course there's an elephant to accompany this fellow, but that's for another update ...
On the painting table is Hannibal from Purgatory, and he's looking very pinstriped at the moment. It isn't a painting technique I've tried before, and it's hard - moreso on this scale. Definitely a technique that needs more practice and a steadier hand to master, but for my first attempt this will do just fine.
There isn't much more to go with the suit, other than tidying the odd overspill on the rear of the figure and then it's on to the rest of the model. The hat and tie are going to move down into blues from the pinkish starting colour, as it's a little too garish right now. After that, it's skin!
Of course there's an elephant to accompany this fellow, but that's for another update ...
Sunday, 19 June 2016
Gualtiero
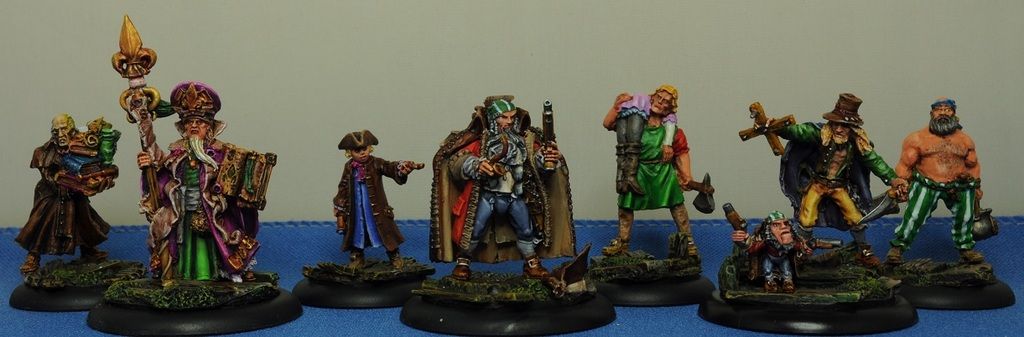
And so the pirate crew is complete, with the addition of my puppet master Gualtiero and his little marionette - who we'll call Piccolo Rosso.
Now technically, if you play Freebooter's Fate, this chap is supposed to be in a different crew (the Cult). It's not a game I play, and I loved the little puppet version of my pirate captain so much that I wanted him to be one of the figures in my little pirate band. It would be nice to add wire between the control bar and the puppet, but I haven't got anything in the toolbox that's suitable.
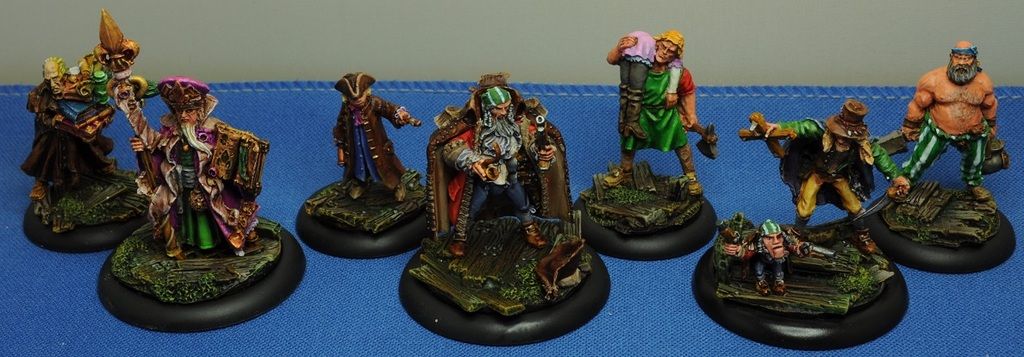
Speaking of which, here's a full and final shot of the crew.
Second shot provided to give a better view of the bases. Hopefully they feel coherent when you're looking at them as a group, despite being from different miniature ranges and factions.
Next project? Over to Purgatory miniatures that I picked up at Salute this year and painting up Hannibal for a four-way painting competition.
This little elephant is reason enough to love a new line of miniatures.
Speaking of which, here's a full and final shot of the crew.
Second shot provided to give a better view of the bases. Hopefully they feel coherent when you're looking at them as a group, despite being from different miniature ranges and factions.
Next project? Over to Purgatory miniatures that I picked up at Salute this year and painting up Hannibal for a four-way painting competition.
This little elephant is reason enough to love a new line of miniatures.
Sunday, 12 June 2016
Captain Rosso
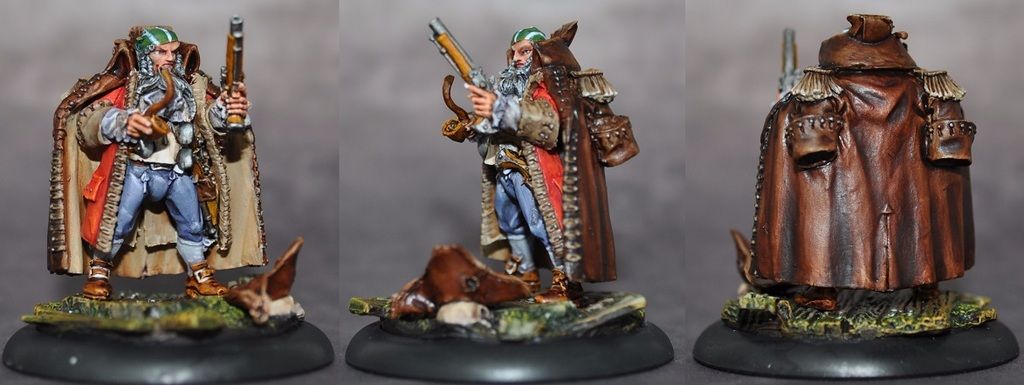
Quiet painting fortnight due to life getting in to the way, but I've finished up another of the pirate crew - Captain Rosso from Freebooter Miniatures.
The official paint job for this guy is ridiculously detailed (a blue iris at this scale? Oh come on!) but I've only used their colours as a general guide to ensure I didn't miss detail. Two things I haven't tried before are present here: use of Vallejo Smoke Ink for shading in places - I bought some years ago on recommendation and forgot about it, and trying Ben Komets' loaded brush technique on the trousers to get a wet blend going. One of these was reasonably successful, the other will quite a lot more practice to master as a way to introducing blending rather than layering to my skill set.
I feel it's a more detailed and characterful sculpt than the Black Scorpion ones, but feel confident the consistency of colour choices across my little warband will make them feel like they belong together. So the bandanna pattern is the same as a crewman's trousers, and the leather coat is painted the same as the cabin boy and navigator.
Only one more to go in the warband now, so we're nearly there.
The official paint job for this guy is ridiculously detailed (a blue iris at this scale? Oh come on!) but I've only used their colours as a general guide to ensure I didn't miss detail. Two things I haven't tried before are present here: use of Vallejo Smoke Ink for shading in places - I bought some years ago on recommendation and forgot about it, and trying Ben Komets' loaded brush technique on the trousers to get a wet blend going. One of these was reasonably successful, the other will quite a lot more practice to master as a way to introducing blending rather than layering to my skill set.
I feel it's a more detailed and characterful sculpt than the Black Scorpion ones, but feel confident the consistency of colour choices across my little warband will make them feel like they belong together. So the bandanna pattern is the same as a crewman's trousers, and the leather coat is painted the same as the cabin boy and navigator.
Only one more to go in the warband now, so we're nearly there.
Sunday, 29 May 2016
Town House
Late last year, I finally took the plunge and ordered some terrain from Tabletop World as I've had my eye on their stuff for a while. Their Christmas sale tipped me over the edge, so my cupboard now has a few of their pieces. It's time to paint one up.
One of the challenge here was for me to paint as much as I could with just the airbrush. Bit of time spent with the airbrush and slow going as I've learned about tightening seals, and airbrush maintenance when you haven't tightened them (whoops), paint mix in differing humidity - but all positive stuff.
This is the first Tabletop World sculpt I've played with, and it's fantastic quality. So a work-in-progress scenery piece done purely with the airbrush to this point ...
Black primer, Sombre Grey, Cold Grey, Dead White as normal then Devlan Mud wash - applying it very thin to the surface then using air to push into the recesses. Little scruffy, but going the right direction and considering this is my first proper use of an airbrush to do more than a boring base colour, the results to-date are better than expected.
Not quite brave enough to tackle the timber with the airbrush and not undo all the stonework, so that's painted by brush as normal.
Couple more tweaks to colour on the wood and touching up some edges of the stone with pure white to give contrast and correct a few mistakes when painting the wood ...
One of the nice things about these terrain pieces from Tabletop World is the level of detail present everywhere, so I'm looking forward to painting up the metalwork next. Windows will be blue just to offer some visual contrast inside and out, and should offset the lead strips in the window nicely.
At this point I realised there's been no shots of the inside of the house so far ...
On the wood I've gone for a bit more variation in colour than on the outside beams, and the walls are painted to look like they've been rendered. I put the airbrush down and started painting in the wood to frame the stonework, and feeling pretty pleased with how it looks now.
One final push and I was able to finish up the Town House. Very pleased with how this turned out for my first terrain piece in quite a few years!
I know that picking out the bolts on a rusted area isn't really accurate, but I like the contrast it offers.
Getting the feel of the airbrush now, it was the main tool for painting this and shaved days off painting terrain by brush. It's no longer a chore, but something enjoyable and this should help to clear down the backlog of terrain pieces sat needing my attention.
Does the colour scheme look familiar to anyone? I based the colour scheme loosely on an old friend ...
I may come back and adjust the windows, as blue windows with the blue roof isn't quite right. But it'll stay like that for the time being - and the next building can be a test piece for that change, rather than continually tweaking the finished one.
Even inside the house, detail is abundant. I love the crumbled render that reveals the original stonework underneath.
It's a good height inside too, the daughters have confirmed it's suitable for their Happyland figures to sit in without feeling cramped. Which is good to know.
One of the challenge here was for me to paint as much as I could with just the airbrush. Bit of time spent with the airbrush and slow going as I've learned about tightening seals, and airbrush maintenance when you haven't tightened them (whoops), paint mix in differing humidity - but all positive stuff.
This is the first Tabletop World sculpt I've played with, and it's fantastic quality. So a work-in-progress scenery piece done purely with the airbrush to this point ...
Black primer, Sombre Grey, Cold Grey, Dead White as normal then Devlan Mud wash - applying it very thin to the surface then using air to push into the recesses. Little scruffy, but going the right direction and considering this is my first proper use of an airbrush to do more than a boring base colour, the results to-date are better than expected.
Not quite brave enough to tackle the timber with the airbrush and not undo all the stonework, so that's painted by brush as normal.
Couple more tweaks to colour on the wood and touching up some edges of the stone with pure white to give contrast and correct a few mistakes when painting the wood ...
One of the nice things about these terrain pieces from Tabletop World is the level of detail present everywhere, so I'm looking forward to painting up the metalwork next. Windows will be blue just to offer some visual contrast inside and out, and should offset the lead strips in the window nicely.
At this point I realised there's been no shots of the inside of the house so far ...
On the wood I've gone for a bit more variation in colour than on the outside beams, and the walls are painted to look like they've been rendered. I put the airbrush down and started painting in the wood to frame the stonework, and feeling pretty pleased with how it looks now.
I know that picking out the bolts on a rusted area isn't really accurate, but I like the contrast it offers.
Getting the feel of the airbrush now, it was the main tool for painting this and shaved days off painting terrain by brush. It's no longer a chore, but something enjoyable and this should help to clear down the backlog of terrain pieces sat needing my attention.
Does the colour scheme look familiar to anyone? I based the colour scheme loosely on an old friend ...
I may come back and adjust the windows, as blue windows with the blue roof isn't quite right. But it'll stay like that for the time being - and the next building can be a test piece for that change, rather than continually tweaking the finished one.
Even inside the house, detail is abundant. I love the crumbled render that reveals the original stonework underneath.
It's a good height inside too, the daughters have confirmed it's suitable for their Happyland figures to sit in without feeling cramped. Which is good to know.
Sunday, 15 May 2016
Star Wars: Armada Rebel Fleet test
A friend picked up the Star Wars: Armada game recently. It's not quite to my taste, but I volunteered to try and paint up a few of the figures as the small supporting fighters for the big ships don't come pre-painted. There are 70-80 of these and they're tiny, so I wanted to generate something that would be quick to replicate without leaving myself in a hole for the rest of the year.
A-Wing
Y-Wing
X-Wing
B-Wing
Basically they were primed white, washed with thinned down Army Painter strong tone with a few white elements picked out. After that just a couple of quick details like exhaust wear, engine colouring and unit markings.
Did I say they were tiny? Here's an idea of scale for these figures ...
A-Wing
Y-Wing
X-Wing
B-Wing
Basically they were primed white, washed with thinned down Army Painter strong tone with a few white elements picked out. After that just a couple of quick details like exhaust wear, engine colouring and unit markings.
Did I say they were tiny? Here's an idea of scale for these figures ...
Monday, 2 May 2016
Black Scorpion: Preacher
Finally completed the hired hands from Black Scorpion, with the Preacher joining the party ...
Group shot of the finished crew ...
Sadly I dropped the Navigator and the candle snapped off and I can't find it anywhere - so that's why he's relegated to the back row :( Miffed about that, but I'm hopeful it will turn up at some point.
Enjoyed painting these, but the sculpts aren't as crisp in the minutiae as others I've painted recently - and when, like me, you're limited in ability it's surprising how often you rely on the features to do the heavy lifting for you. With that said, I picked up their Salute 2016 figure this year and that looks to be a little step up in quality again, so more power to them.
While this finishes off the set of five, it doesn't see the end of the pirates just yet. So here's a teaser for what's coming next ...
To paraphrase Princess Leia ... aren't you a little short for a pirate?
Group shot of the finished crew ...
Sadly I dropped the Navigator and the candle snapped off and I can't find it anywhere - so that's why he's relegated to the back row :( Miffed about that, but I'm hopeful it will turn up at some point.
Enjoyed painting these, but the sculpts aren't as crisp in the minutiae as others I've painted recently - and when, like me, you're limited in ability it's surprising how often you rely on the features to do the heavy lifting for you. With that said, I picked up their Salute 2016 figure this year and that looks to be a little step up in quality again, so more power to them.
While this finishes off the set of five, it doesn't see the end of the pirates just yet. So here's a teaser for what's coming next ...
To paraphrase Princess Leia ... aren't you a little short for a pirate?
Subscribe to:
Posts (Atom)