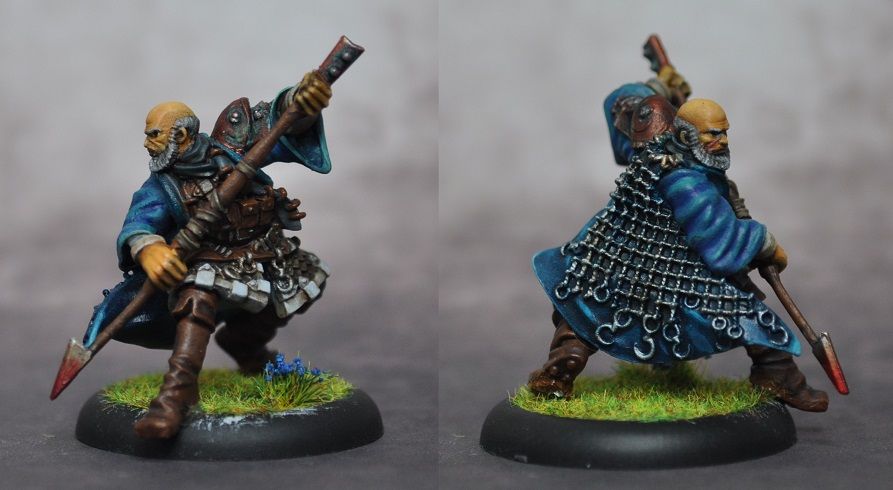
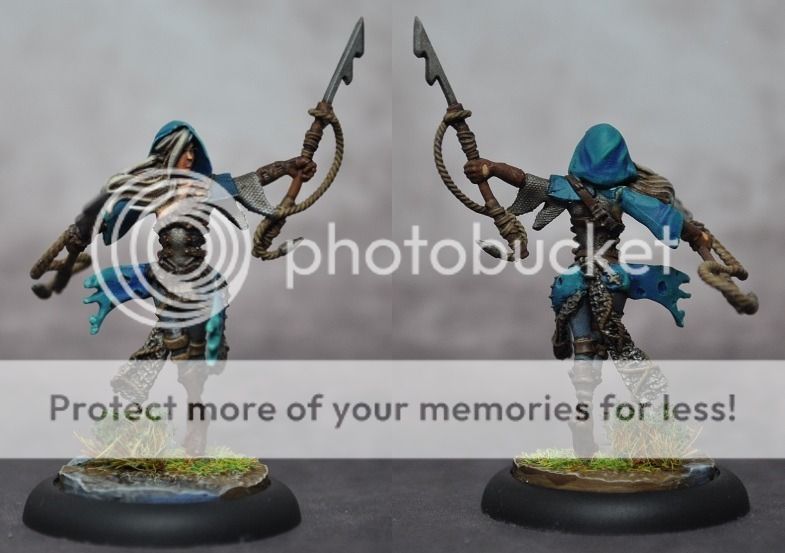
Quicker than expected, but I managed to finish up Angel from the Fishermen ... and now my eyes hurt.
I've been putting this one off a while now because the detail was so tiny yet overwhelming but, armed with my new magnifying lens and a burst of Monday night enthusiasm, it's now finished up and I'm pretty happy. Also ... man this was nice to do after nothing but tabletop quality hordes over the last month!
Good quality skin tones still elude me, but the face is definitely a face - complete with eyes (fifth attempt). Metals turned out alright, and a little variety in leathers even if they're not so noticable on the hasty photographs. Hair was an experiment which came out reasonably well, but I had X-Men comics' Jean Grey in mind and when I looked her up it's nothing like her! So which comic book hero am I thinking of?
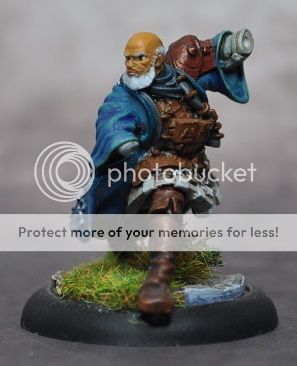
And a reminder of how flippin' small this lady is ...
... which is probably a personal best on the size scale. But honestly, trying to visually refocus on anything is a hardship now. Only Shark left to do from the Fishermen to have a full team painted and then I can consider the next small project - but it's in danger of becoming a chore at this point, so need to push through and get him done quickly.
Thursday, 10 March 2016
Sunday, 28 February 2016
Zombicide: Black Plague - Runners
Continuing my plan of having a fully painted tabletop game, here are the Runners from Zombicide painted up, all fourteen of them.
Runners are fantastic pieces in the game and by the simple virtue of having two actions instead of one, they make you rethink a number of cunning plans as they can be on you considerably quicker than expected if they gain an extra activation from the card.
Despite them being great on the table, I didn't enjoy painting these and think it shows. Not happy with them, but want them gone. Couldn't tell you the reason why I didn't, as the sculpts are perfectly fine, but I've literally dashed through them and feel glad they're off the desk and on to the board.
The original plan was to have different base colouring for each monster type, but after a little thinking I've opted to paint the base rims red, same as the Fatties. I realised it's easy to distinguish between Runners and Fatties, and as there'll inevitably be expansion boxes, having the monsters from the core game with the same base colour probably makes more sense, so if they release a box of toxics they'll get green and so on. The vanilla Zombie Walkers, Necromancers and Abominations will get boring black bases. Mmm, vanilla.
Runners are fantastic pieces in the game and by the simple virtue of having two actions instead of one, they make you rethink a number of cunning plans as they can be on you considerably quicker than expected if they gain an extra activation from the card.
Despite them being great on the table, I didn't enjoy painting these and think it shows. Not happy with them, but want them gone. Couldn't tell you the reason why I didn't, as the sculpts are perfectly fine, but I've literally dashed through them and feel glad they're off the desk and on to the board.
The original plan was to have different base colouring for each monster type, but after a little thinking I've opted to paint the base rims red, same as the Fatties. I realised it's easy to distinguish between Runners and Fatties, and as there'll inevitably be expansion boxes, having the monsters from the core game with the same base colour probably makes more sense, so if they release a box of toxics they'll get green and so on. The vanilla Zombie Walkers, Necromancers and Abominations will get boring black bases. Mmm, vanilla.
What's next? Well, I'm finally biting the bullet and finishing up my last two Fishermen for Guild Ball - about a year after starting the project. After painting a lot of tabletop quality recently, I'm looking forward to doing something a little more complex!
Tuesday, 2 February 2016
Pink Horrors of Tzeentch (and their Yellow cousin)
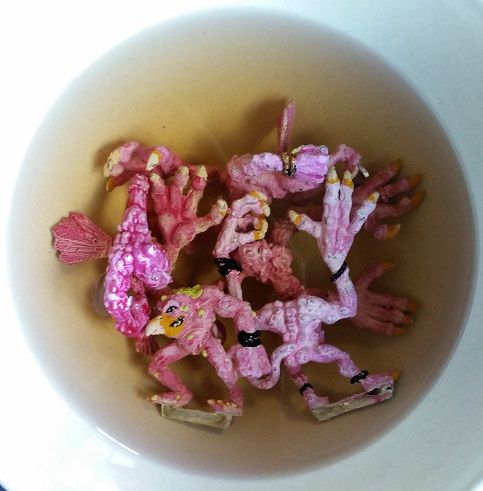
Fun start to the month. My plans were thrown aside when my eldest daughter declared she'd like to learn how to paint. At the tender age of five, I thought it best to start simple, so pulled some very old figures out of storage and cleaned them up. Behold a few original Pink Horrors of Tzeentch.
They're having a bath of nail polish remover to rid them of their old skins, as this is how they came when buying them on eBay many moons ago. Three layers of paint on the poor things, so I'm sure the Changer of Ways would approve of this transformative soup. But then a spanner in the works ...
"Daddy, what are these called?"
"These are Pink Horrors, sweetie."
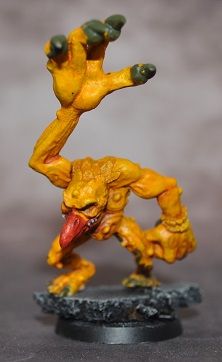
"Okay ... I want to paint mine yellow."
*sound of my left eye twitching*
... and lo, the Great Conspirator messes with my head once again. But not the end of the world! We kept the painting simple, literally just main colours then a thin red wash to complement the beak.
One of my brood sitting still for nearly two hours in itself would be an achievement, but having something to show for it is remarkable. She wants to come back and add pink bracelets in the future, but it's now matt varnished so she can handle it without fear of rubbing off any of the paint she's applied so far.
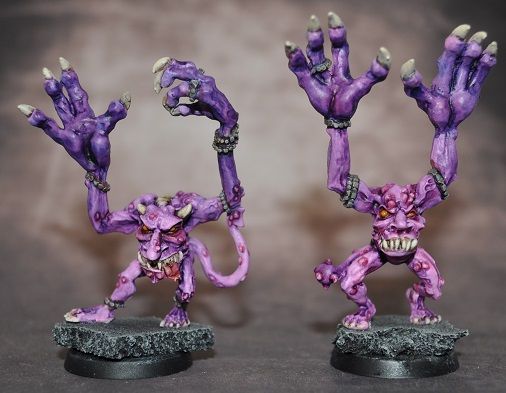
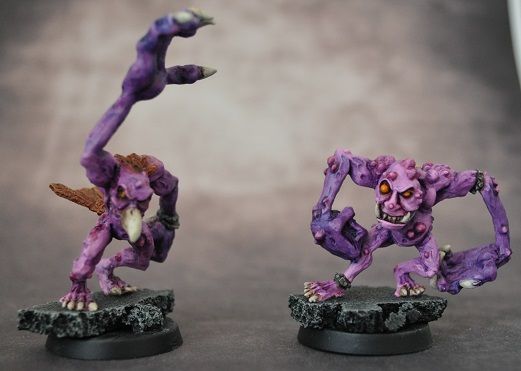
While the daughter was cracking on with hers, I painted up its companions in a similar style but with the right colours, damnit. So it was application of base colour (Squid Pink) then literally just thin washes of purple, red and blue over various areas. This is also the first time I've used cork for basing and it's great stuff! My first go isn't too grand, but with a little more practice it'll make a solid and quick basing technique for ad-hoc projects.
Sadly my trusty daylight lamp is irretrievably broken and I had to use the camera flash for lighting, which isn't too great. The bottom right fellow, who I've nicknamed Gumby is probably my favourite, but they're lovely sculpts. While it's not the best output I've produced, it's not often you get the kids wanting to join in on hobbies and high on the fun scale. I hope she does want to give it another go, as it was a real blast.
There'll probably be a small pause in painting in the next couple of weeks as I've got a new job (hooray!) and want to throw myself into that when it starts later this week.
They're having a bath of nail polish remover to rid them of their old skins, as this is how they came when buying them on eBay many moons ago. Three layers of paint on the poor things, so I'm sure the Changer of Ways would approve of this transformative soup. But then a spanner in the works ...
"Daddy, what are these called?"
"These are Pink Horrors, sweetie."
"Okay ... I want to paint mine yellow."
*sound of my left eye twitching*
... and lo, the Great Conspirator messes with my head once again. But not the end of the world! We kept the painting simple, literally just main colours then a thin red wash to complement the beak.
One of my brood sitting still for nearly two hours in itself would be an achievement, but having something to show for it is remarkable. She wants to come back and add pink bracelets in the future, but it's now matt varnished so she can handle it without fear of rubbing off any of the paint she's applied so far.
While the daughter was cracking on with hers, I painted up its companions in a similar style but with the right colours, damnit. So it was application of base colour (Squid Pink) then literally just thin washes of purple, red and blue over various areas. This is also the first time I've used cork for basing and it's great stuff! My first go isn't too grand, but with a little more practice it'll make a solid and quick basing technique for ad-hoc projects.
Sadly my trusty daylight lamp is irretrievably broken and I had to use the camera flash for lighting, which isn't too great. The bottom right fellow, who I've nicknamed Gumby is probably my favourite, but they're lovely sculpts. While it's not the best output I've produced, it's not often you get the kids wanting to join in on hobbies and high on the fun scale. I hope she does want to give it another go, as it was a real blast.
There'll probably be a small pause in painting in the next couple of weeks as I've got a new job (hooray!) and want to throw myself into that when it starts later this week.
Tuesday, 19 January 2016
Zombicide: Black Plague - Fatties
A more productive January than I thought it would be, so here come the Fatties!
They're not all in perfect focus, but I'm sure you get the gist :) One of the figures, poor grey chap in the middle row, suffered from me varnishing him in low temperatures this morning before adding blood for the photos yet the others weren't affected.
Alas, my magnifying lens and light on an extendable arm fell apart this morning so I need to fix it or source a replacement in order for me to pick out tiny details. It was instrumental in finding teeth, stitching and eyes on these figures.
Colours blocked in, lots of shading and washes, purple shading on the skin as they didn't look ill enough, then couple of details picked out with highlights (ropes, eyes, teeth, ropes etc.) and much blood applied - so these are quick and dirty paintjobs, literally! I want to keep them grimy in contrast to the upcoming hero figures who'll be a little brighter. The flowers are there because ... who doesn't love flowers?
I'll start on the Runners next with the goal of having those completed in February.
They're not all in perfect focus, but I'm sure you get the gist :) One of the figures, poor grey chap in the middle row, suffered from me varnishing him in low temperatures this morning before adding blood for the photos yet the others weren't affected.
Colours blocked in, lots of shading and washes, purple shading on the skin as they didn't look ill enough, then couple of details picked out with highlights (ropes, eyes, teeth, ropes etc.) and much blood applied - so these are quick and dirty paintjobs, literally! I want to keep them grimy in contrast to the upcoming hero figures who'll be a little brighter. The flowers are there because ... who doesn't love flowers?
Thursday, 14 January 2016
2015 Painting Review, 2016 Planning
Picking up old, dusty hobbies takes some practice and last year was tricky to re-engergise my interest in painting. To help get back into the swing, I took up the AmmoBunker's One Miniature A Month Challenge (OMAM for short) and it's exactly how it sounds - The goal is to generate regular output over the course of a year. This was perfect for me slipping back into the hobby, and provided the spur I needed to call a project finished instead of letting it sit on the work-in-progress shelf at 99%.
2015
Summary of the calendar year output as follows ...
While these won't be winning painting competitions any time soon, it wasn't the point - I've managed to convert unpainted figures into painted ones, relearned a few techniques and discovered new ones to be terrible at. All in all, a most satisfactory year.
2016
The goals for this year, so far, are:
2015
Summary of the calendar year output as follows ...
- January - Captain Victoria Haley (Warmachine)
- February - Space Hulk: Objective Marker (Space Hulk)
- March - 2 Cthulhu turn markers, 3 Gretchin (Warhammer 40,000)
- April - 3 Probe Droids (Imperial Assault), 17 Gretchin (Warhammer 40,000)
- May - 22 Genestealers (Space Hulk)
- June - Kraken (Guild Ball)
- July - 2 Abominations (Zombicide) 2 Scenery pieces (Zombicide), Pash Grolin & Kay Dee (Colony 87), Salt & Kraken (Guild Ball)
- August - Lord & Lady Greiss (Colony 87)
- September - Barcoon Karbosh (Colony 87)
- October - Alexei The Wanderer (Colony 87)
- November - Siren & Greyscales (Guild Ball)
- December - Infernal Golem (Titan Forge)
While these won't be winning painting competitions any time soon, it wasn't the point - I've managed to convert unpainted figures into painted ones, relearned a few techniques and discovered new ones to be terrible at. All in all, a most satisfactory year.
2016
The goals for this year, so far, are:
- Finish something every month. This worked really well during 2015, so I'm keen to continue this approach to generate quality output on a regular basis.
- Put a significant dent into the figures used in our weekly tabletop gaming sessions. First on the list is the Zombicide: Black Plague as that will see a good 200-300 figures once everything from the Kickstarter arrives, and that's a bananas number of figures to have sitting in a box for a game that's played almost every week. There are other games sat there in need of the same treatment, but we'll start here.
- Manage my purchases more carefully. No need to overcomplicate things with unnecessary rules (one in, ten out may be applicable!) but it needs to be pretty special to be bought, as my nerd cupboard is bulging with great pieces bought last year that I haven't painted yet.
- Completing half-finished projects. Starting with my Guild Ball teams for Fishermen & Engineers, who will be wrapped up so we have tabletop-worthy figures to play with.
Sunday, 10 January 2016
Zombicide: Black Plague - painting begins
I've started into the Zombicide: Black Plague figures this week. Nothing finished yet, but here's the first WIP of tabletop level paintjobs.
If you haven't played Zombicide yet, it's a co-operative boardgame where it's you versus the board in various missions with relentless waves of zombies joining the battle each round, and you have to find the balance between completion the missions and re-killing the undead. Marvellous fun, 2-3 hours for longer games and a real hoot - glad I backed this version, and there'll be quite a few additions over the coming months. Pressure is on for getting the rank and file back on the table, as we've been playing this quite a bit since mid-December arrival so they need to be ready quicksharp for the next round of games incoming.
These represent the Runners (14 of 'em), Fatties (another 14), an Abomination and a Necromancer from the base box. The Walkers will follow later, as there's 30-40 of those buggers and even I'm not daft enough to take on that many figures simultaneously - a lesson learned from my Gretchin mob last year! When gaming, weight of numbers on the table becomes a problem and it's hard to distinguish who's what - so I'll be painting the base edges red for Fatties, and orange for Runners. Everything else should be evident enough not to require it.
I'm batch painting the Fatties and going for reasonably boring colours, so mid-range blues, reds, greys and greens. By working on a small group it means I can move reasonably quickly while adding a little variety in where the colours are used. There's more coming in a few months, so I'll repeat the trick with slightly different colours, but the hordes will be dull but legion. The bases have a little texture added using some Vallejo Sandy Paste - my experience of it so far? It's like a resin-based version of Polyfilla.
Shading down on the first fellow. Detail and highlights next, and possibly even followed by proper pictures! Few of the details are crisply modelled but not obvious to my eye on the first pass, so shadows before highlights gives me a chance of spotting them and painting them correctly. There won't be gore added to the zombies until the very last stage as they'll all be matt varnished on completion and I don't want that beautiful glossy blood effect dampening. It will also be my shameless opportunity to cover up any glaring errors with blood and calling it "characterful", in the same way I call my awful cooking "rustic" ;)
If you haven't played Zombicide yet, it's a co-operative boardgame where it's you versus the board in various missions with relentless waves of zombies joining the battle each round, and you have to find the balance between completion the missions and re-killing the undead. Marvellous fun, 2-3 hours for longer games and a real hoot - glad I backed this version, and there'll be quite a few additions over the coming months. Pressure is on for getting the rank and file back on the table, as we've been playing this quite a bit since mid-December arrival so they need to be ready quicksharp for the next round of games incoming.
These represent the Runners (14 of 'em), Fatties (another 14), an Abomination and a Necromancer from the base box. The Walkers will follow later, as there's 30-40 of those buggers and even I'm not daft enough to take on that many figures simultaneously - a lesson learned from my Gretchin mob last year! When gaming, weight of numbers on the table becomes a problem and it's hard to distinguish who's what - so I'll be painting the base edges red for Fatties, and orange for Runners. Everything else should be evident enough not to require it.
I'm batch painting the Fatties and going for reasonably boring colours, so mid-range blues, reds, greys and greens. By working on a small group it means I can move reasonably quickly while adding a little variety in where the colours are used. There's more coming in a few months, so I'll repeat the trick with slightly different colours, but the hordes will be dull but legion. The bases have a little texture added using some Vallejo Sandy Paste - my experience of it so far? It's like a resin-based version of Polyfilla.
Shading down on the first fellow. Detail and highlights next, and possibly even followed by proper pictures! Few of the details are crisply modelled but not obvious to my eye on the first pass, so shadows before highlights gives me a chance of spotting them and painting them correctly. There won't be gore added to the zombies until the very last stage as they'll all be matt varnished on completion and I don't want that beautiful glossy blood effect dampening. It will also be my shameless opportunity to cover up any glaring errors with blood and calling it "characterful", in the same way I call my awful cooking "rustic" ;)
Thursday, 31 December 2015
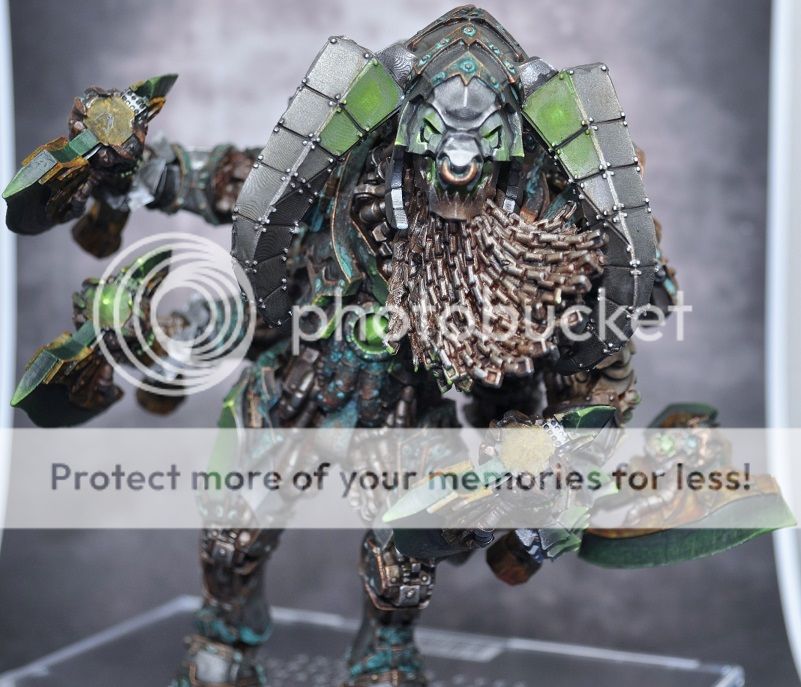
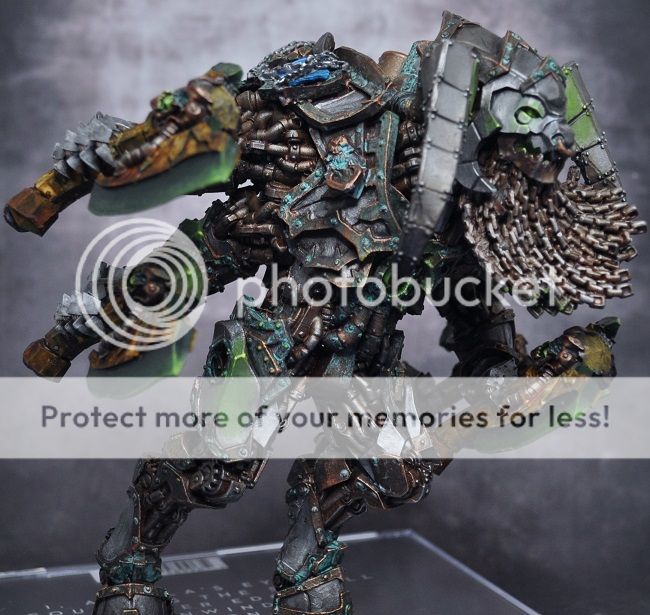
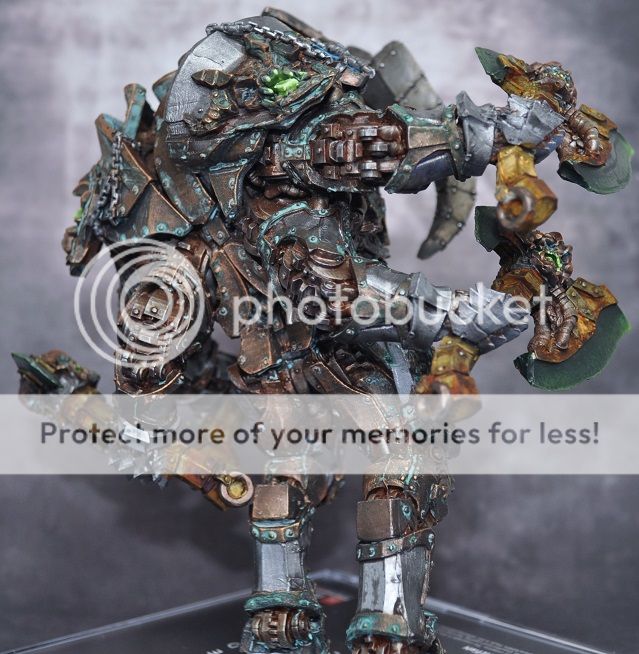
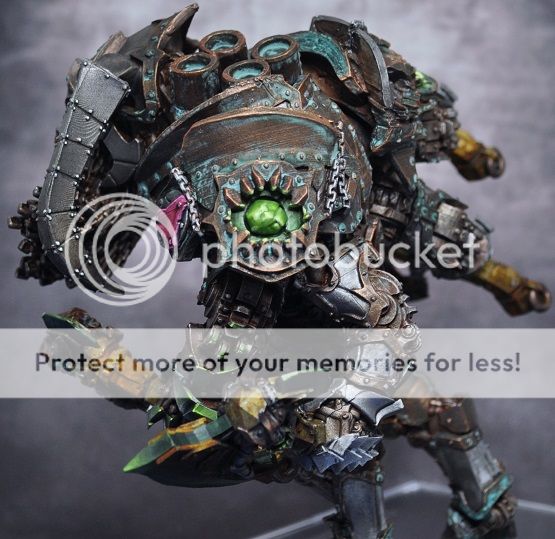
Infernal Golem of Kashan Vra
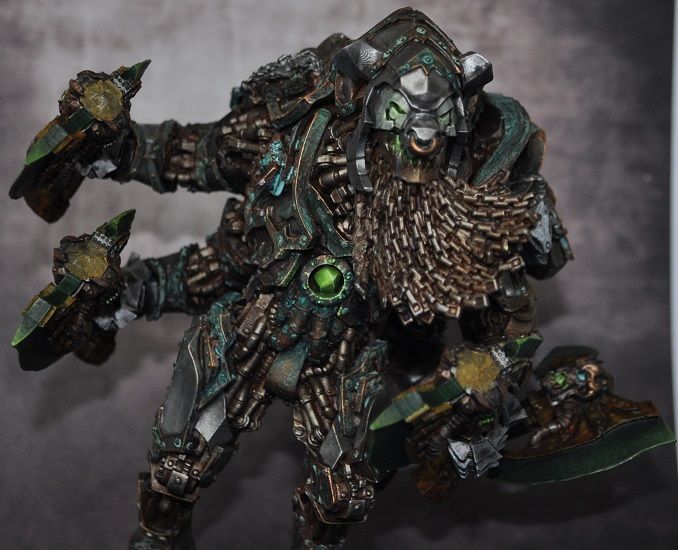
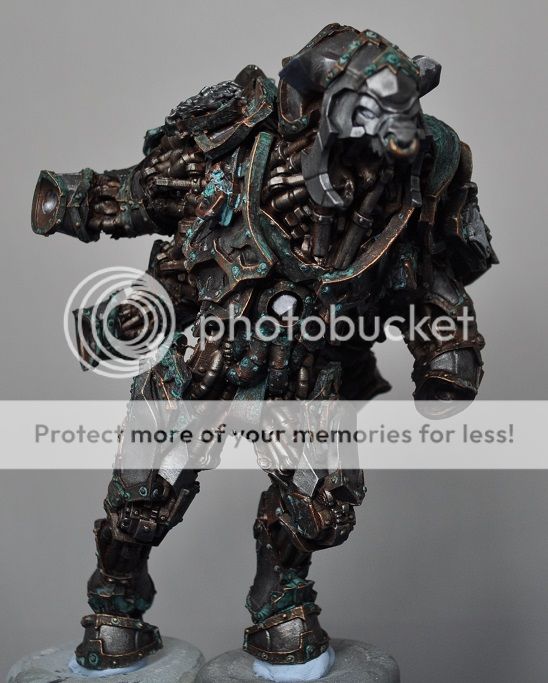
This is cutting is close to the wire, but my final finished figure of 2015 is here! For the life of me I couldn't get a decent photo*, but with time constraint today of getting it wrapped to meet my goal of at least one miniature completed every month ... it'll do.
* But in the words of the immortal Bucks Fizz, the camera never lies.
He's a beast of a figure, and ridiculously unbalanced weight wise, which has caused me a few problems. I've taken him off his base while I think about how to base to offset the front leaning pose that's causing the problem. Why no shots of the feet? He's stuck onto a Guy Garvey CD with blue tack in the best of makeshift "basing" :D
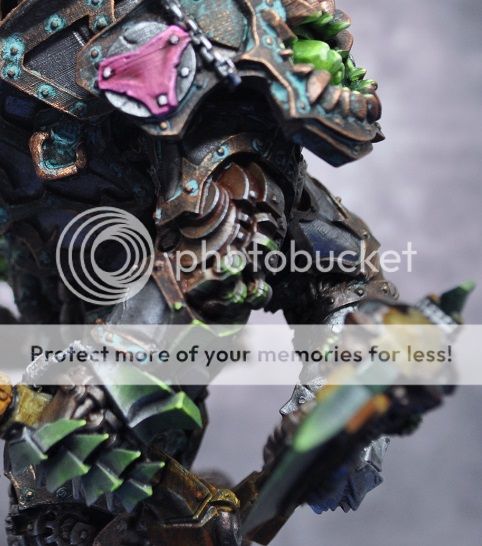
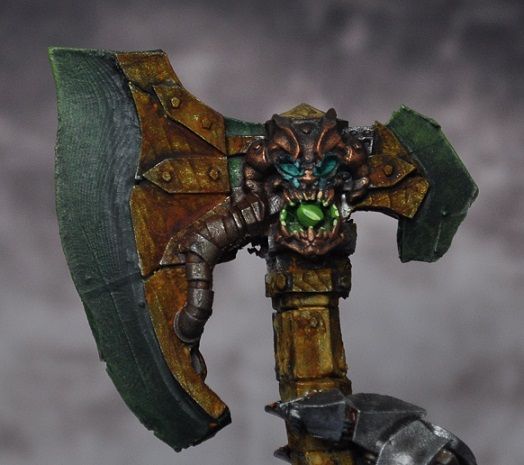
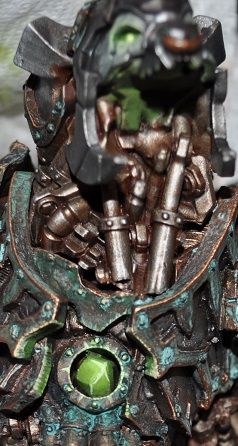
I've tried to make it look like the glow from his eyes is reflecting onto spots on the horns. I know it'scrude not quite right, but it's a learning for the future ;)
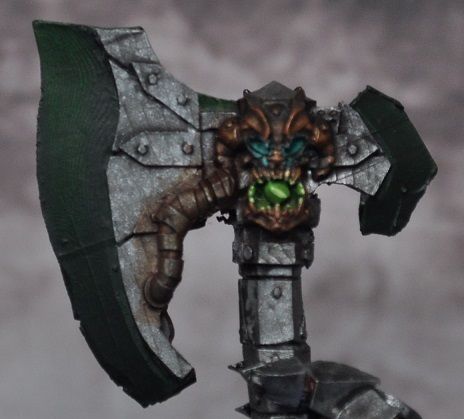
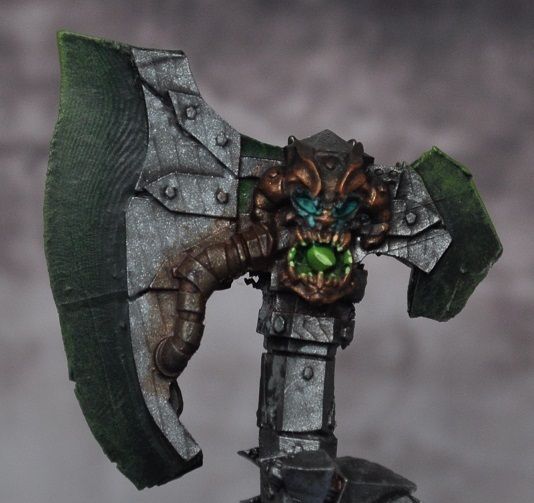
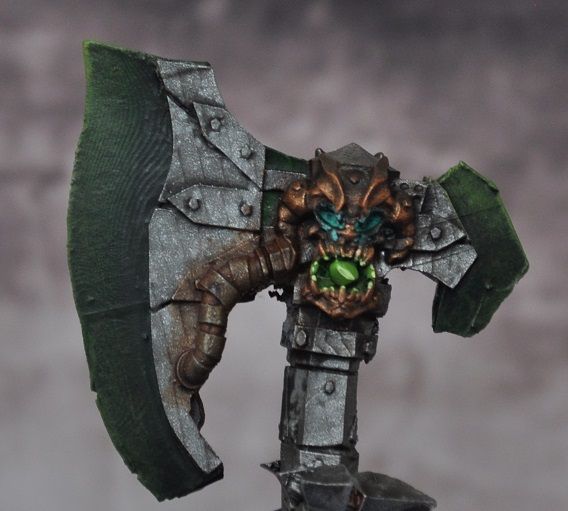
I had a bit more fun with the OSL and tried to have it reflect back off the axe heads onto the body of the figure where appropriate. I need a lot more practice of this technique, but it's good fun.
In hindsight, I think the sculpt's lovely but the kit itself is a little disappointing. The production method used has left odd striations on almost every surface - most noticable on the horns and axe blades - and almost no surface is perfectly smooth as I'd expect from a high-end resin kit. There's quite a bit I know can be improved but by yesterday I'd hit a wall of wanting it done and off the painting desk, but it took me far outside my 28mm figure comfort zone and encouraged me to try a few new techniques and that's no bad thing. More importantly, that concludes my first year back into painting after four years out of the hobby and I'm glad to be back.
* But in the words of the immortal Bucks Fizz, the camera never lies.
He's a beast of a figure, and ridiculously unbalanced weight wise, which has caused me a few problems. I've taken him off his base while I think about how to base to offset the front leaning pose that's causing the problem. Why no shots of the feet? He's stuck onto a Guy Garvey CD with blue tack in the best of makeshift "basing" :D
I've tried to make it look like the glow from his eyes is reflecting onto spots on the horns. I know it's
I had a bit more fun with the OSL and tried to have it reflect back off the axe heads onto the body of the figure where appropriate. I need a lot more practice of this technique, but it's good fun.
In hindsight, I think the sculpt's lovely but the kit itself is a little disappointing. The production method used has left odd striations on almost every surface - most noticable on the horns and axe blades - and almost no surface is perfectly smooth as I'd expect from a high-end resin kit. There's quite a bit I know can be improved but by yesterday I'd hit a wall of wanting it done and off the painting desk, but it took me far outside my 28mm figure comfort zone and encouraged me to try a few new techniques and that's no bad thing. More importantly, that concludes my first year back into painting after four years out of the hobby and I'm glad to be back.
Thursday, 24 December 2015
Infernal Golem and painting glowing blades
So, I got ahead of the Christmas wrapping curve, and was able to make a little progress with the big man today. While I remain undecided on how to proceed with the blades, I did manage to reach a happy mid-point where it's not pure black, and does echo the greens of the embedded stones. I realised they put me in mind of warpstone from Warhammer Fantasy, so have proceeded to paint the blades as though they'd been fashioned with that same magic. A flying step-by-step for how I got the effect.
Basecoat the blade with Dark Green, then a dark brown wash into the recess
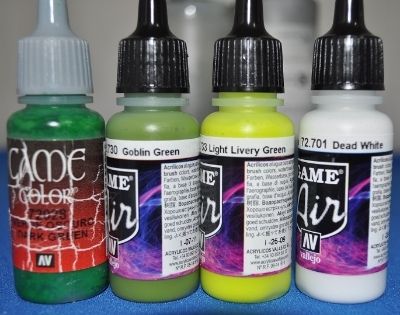
Drybrush with Goblin Green then Livery Green along the edges
Smooth down with a Dark Green glaze
Go bananas with the rust effect to see how it looks ...
Glue the damned thing together, even though it's not finished.
Still quite a bit to do, but it's nice to see the model taking shape and I'm happy with the progress! Alright, it won't be winning awards but I've had fun painting it :D Needs highlights adding back on the metals, but now I'm undecided whether to stick with the blades as is, or crack on with the original plan ... I may wuss out for the time being and leave it as is. Once finished and matt varnish is applied, they could benefit from gloss varnish being added to give an onyx-like feel.
As I've kept the OSL quite soft on the stones, despite their size, I'm not sure how much I'd apply from the blades back to the body, but will chew on it over the festive season. Also - now it's assembled I've realised that the weight of this figure is an issue. It's unbalanced and leaning forward heavily - which is how the sculpt requires it assembled, but now I need to counterbalance at the back to stop it tipping over.
Progress now paused for a few days, so Merry Christmas one and all!
Basecoat the blade with Dark Green, then a dark brown wash into the recess
Drybrush with Goblin Green then Livery Green along the edges
Smooth down with a Dark Green glaze
Go bananas with the rust effect to see how it looks ...
Glue the damned thing together, even though it's not finished.
Still quite a bit to do, but it's nice to see the model taking shape and I'm happy with the progress! Alright, it won't be winning awards but I've had fun painting it :D Needs highlights adding back on the metals, but now I'm undecided whether to stick with the blades as is, or crack on with the original plan ... I may wuss out for the time being and leave it as is. Once finished and matt varnish is applied, they could benefit from gloss varnish being added to give an onyx-like feel.
As I've kept the OSL quite soft on the stones, despite their size, I'm not sure how much I'd apply from the blades back to the body, but will chew on it over the festive season. Also - now it's assembled I've realised that the weight of this figure is an issue. It's unbalanced and leaning forward heavily - which is how the sculpt requires it assembled, but now I need to counterbalance at the back to stop it tipping over.
Wednesday, 23 December 2015
Infamy: Welcome to The Big Smoke - unboxing
While it's a slow month on the painting side so far, it's a great month for procrastination, sorting and filing miniatures and receiving Kickstarters. Chief among them has been the delivery of my Infamy Big Smoke order from the middle of last year. It took a while to arrive, and was a good six months past the originally anticipated date but was well worth the wait. I finally got the chance to sit down and catalog the pieces before assembling and priming ...
The detail on these figures is fantastic across the range, no matter the sculptor, and they've left me in the same wonderful and terrible position that Guild Ball did. I have a set of supremely detailed figures that I'll never do justice to paint-wise. It has given me an appreciation of the talent of folk painting them to such a high standard. I was impressed by Megazord Man's output before I had hands on the figures - but now I've seen the size of them, I don't even know how he can pick out that detail by eye - let alone paint it so beautifully.
Regarding Infamy themselves, they ran a great campaign, and had regular, informative updates for the backers and I'd consider backing subsequent campaigns. Well, once this mountain of resin is painted ...
The detail on these figures is fantastic across the range, no matter the sculptor, and they've left me in the same wonderful and terrible position that Guild Ball did. I have a set of supremely detailed figures that I'll never do justice to paint-wise. It has given me an appreciation of the talent of folk painting them to such a high standard. I was impressed by Megazord Man's output before I had hands on the figures - but now I've seen the size of them, I don't even know how he can pick out that detail by eye - let alone paint it so beautifully.
Regarding Infamy themselves, they ran a great campaign, and had regular, informative updates for the backers and I'd consider backing subsequent campaigns. Well, once this mountain of resin is painted ...
Tuesday, 22 December 2015
Infernal Golem and OSL
With a little mojo returning in the run up to Christmas, here's another update!Good times.
Following a lovely little glowing eye guide by jah-joshua, to achieve that lovely object sourced lighting effect (OSL), I didn't have quite the same colours, so a spot of improvisation required ...
I've done the Golem's eyes and the warpstones powering him, and find myself very happy with how this effect has turned out.
But do you see the Xbox logo in there too?
I think my Golem's powered by Microsoft ...
There's green inside the upper jaw, as I'm doing the effect inside the mouth to show the glow coming from inside the creature's workings.
Looks a bit wafty right now, but will be fine once the lower jaw's attached.
In parallel, I've been working on the hands and weapons ...
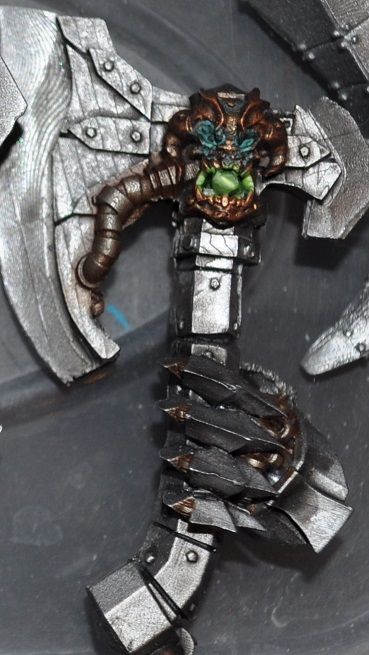
Coupled with the verdigris around the eyes, it gives a little personality to the axe heads.
However ... as there's already so much metal, I was thinking that the axe blades could be stone. Thoughts?
Monday, 21 December 2015
Infernal Golem progresses
Doesn't time fly. Some painting progress has been made, with only the metal plates remaining reasonably clean at this point. He's shaded and verdigrised to heck at this point, and had the good fortune of a head being added. The slightly 'off' join on the neck isn't an issue as there's a metal beard to be added which will make that go away.
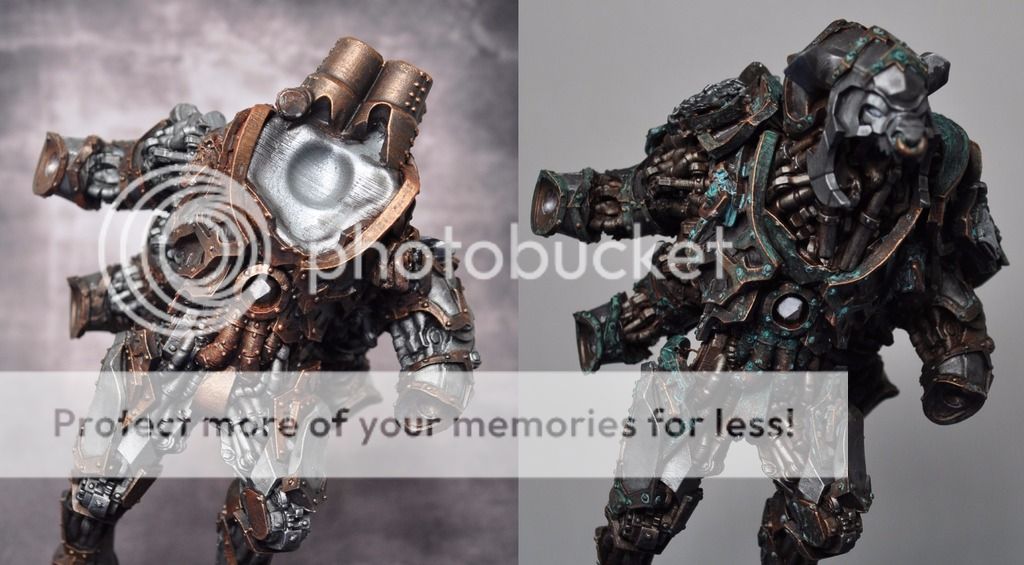
It's possibly hard to tell compared to the last photo further up the thread - so here's a side by side comparison. Arms are in progress to the same stage but not added, because it all overlaps quite confusingly and makes detail work tricky for me.
The inner workings received a coat of AK Interactive Rust Streaks, then I pulled off the excess with cotton buds. Haven't used this before, but will be doing so again. You may cry "he's ruined it!" at this point, but actually I'm really happy with how its turning out - the colouring is a little more severe in the photo than real life, and pleasingly uneven. It looks like an unloved machine that hasn't been looked after - and may be a little pissed off by this.
Deciding on how or even whether to apply rust onto the exterior metal plates. I think I should, but any thoughts or comments for more experienced weathering wizards?
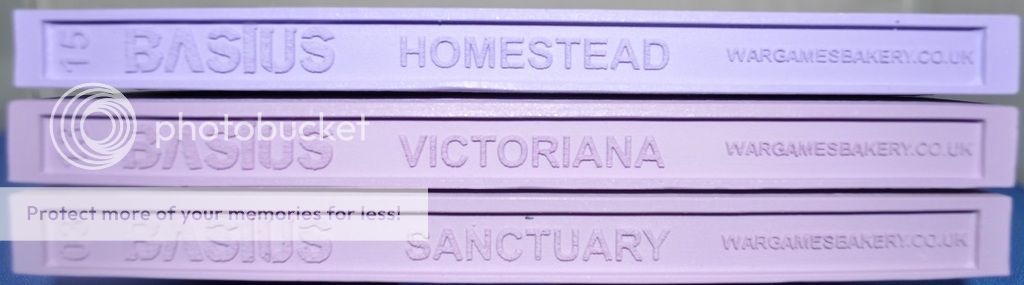
Last up, a recently backed Kickstarter project - the Basius series of molds to apply your greenstuff to for custom bases. It'll be a little while until they get a run out, but they look the business and the project was well run - even if the project page was laid out like a Geocities escapee :D
But they stack oh so neatly!
It's possibly hard to tell compared to the last photo further up the thread - so here's a side by side comparison. Arms are in progress to the same stage but not added, because it all overlaps quite confusingly and makes detail work tricky for me.
The inner workings received a coat of AK Interactive Rust Streaks, then I pulled off the excess with cotton buds. Haven't used this before, but will be doing so again. You may cry "he's ruined it!" at this point, but actually I'm really happy with how its turning out - the colouring is a little more severe in the photo than real life, and pleasingly uneven. It looks like an unloved machine that hasn't been looked after - and may be a little pissed off by this.
Deciding on how or even whether to apply rust onto the exterior metal plates. I think I should, but any thoughts or comments for more experienced weathering wizards?
Last up, a recently backed Kickstarter project - the Basius series of molds to apply your greenstuff to for custom bases. It'll be a little while until they get a run out, but they look the business and the project was well run - even if the project page was laid out like a Geocities escapee :D
But they stack oh so neatly!
Monday, 30 November 2015
Guild Ball Fishermen: Greyscales
Not as much painting over the last week, but did manage to get a few games of Rum & Bones (still love it) and my first run through with Rise of the Kage (it's a grower).
However, still made it in time for the end of the month with Greyscales.
Bit of a basing nightmare when I accidentally snapped the pin in his foot, so had to throw him on a last minute replacement. So yes, the base still needs a little tidying.
Played around with trying to do better skintones, and my first play with the Tamiya Clear Red on the blade - need more practice on both, but we're getting there.
As an aside, funny that this chap's got an armour rating of 0 in the game. Even if I'd done the rope on the cloak as actual rope and not a chainmail effect, he'd still be carrying significant protection with that and the shoulder plate, yet he gets no bonus in game! Go figure.
Next week should see the Golem progress, but a brief pause now as tonight sees an evening out to enjoy the melodic stylings of Slayer & Anthrax.
However, still made it in time for the end of the month with Greyscales.
Bit of a basing nightmare when I accidentally snapped the pin in his foot, so had to throw him on a last minute replacement. So yes, the base still needs a little tidying.
Played around with trying to do better skintones, and my first play with the Tamiya Clear Red on the blade - need more practice on both, but we're getting there.
As an aside, funny that this chap's got an armour rating of 0 in the game. Even if I'd done the rope on the cloak as actual rope and not a chainmail effect, he'd still be carrying significant protection with that and the shoulder plate, yet he gets no bonus in game! Go figure.
Next week should see the Golem progress, but a brief pause now as tonight sees an evening out to enjoy the melodic stylings of Slayer & Anthrax.
Sunday, 22 November 2015
Infernal Golem and Greyscales
Progress made on the Golem this week ...
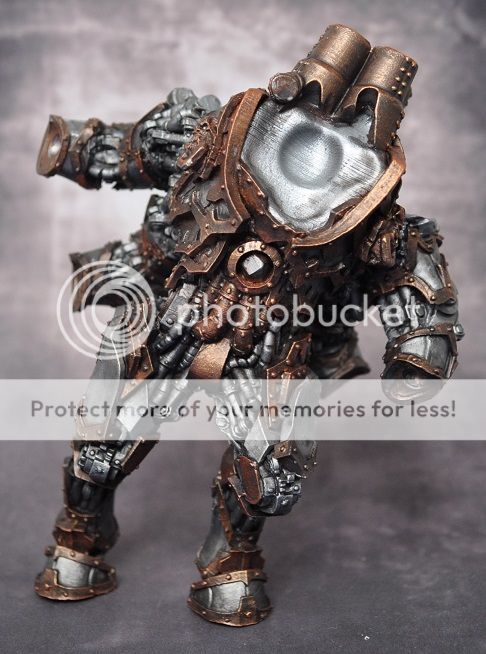
Shading on everything and a little highlighting on the copper now. One thing I've done differently is think about where the light could catch once head and hands are on, so shoulder plates and chest have had more highlighting than other areas. The difference isn't enormous, but I can see it and it feels right. Next up is tidying some of the messiness of my painting then the verdigris, then I can work out how the rest of it fits together.
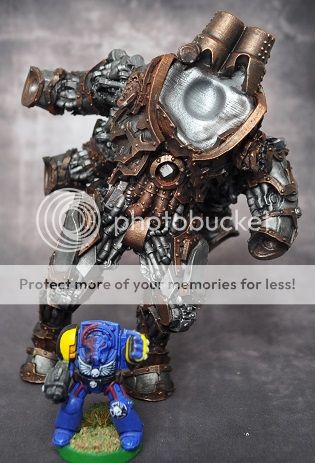
The body alone measures 120mm and I haven't fitted the head yet, but think it'll put him about 130-140mm when done. Comparison body shot versus an old Terminator for scale ...
Here's a shot of Siren (again) but with the back on display as well ...
With hindsight, I'm tempted to go back around the edges of these base inserts and paint them black as the unevenness of them poking out is irking me. I've also made a little progress on Greyscales for my Guild Ball Fishermen's team so he's now the proud owner of eyes ...
This month's goal is to wrap the big fella and Greyscales, and there's a week left for both. No pressure, right?
Shading on everything and a little highlighting on the copper now. One thing I've done differently is think about where the light could catch once head and hands are on, so shoulder plates and chest have had more highlighting than other areas. The difference isn't enormous, but I can see it and it feels right. Next up is tidying some of the messiness of my painting then the verdigris, then I can work out how the rest of it fits together.
The body alone measures 120mm and I haven't fitted the head yet, but think it'll put him about 130-140mm when done. Comparison body shot versus an old Terminator for scale ...
Here's a shot of Siren (again) but with the back on display as well ...
With hindsight, I'm tempted to go back around the edges of these base inserts and paint them black as the unevenness of them poking out is irking me. I've also made a little progress on Greyscales for my Guild Ball Fishermen's team so he's now the proud owner of eyes ...
This month's goal is to wrap the big fella and Greyscales, and there's a week left for both. No pressure, right?
Subscribe to:
Posts (Atom)